Chicken Tempura with Chilli and Sesame Sauce
I love chicken tempura and I’ve previously blogged a recipe for it here, this one is a spiced up version of a recipe I found online, The chicken was light and crispy and the sauce was fresh and tangy!!
It either requires a deep fryer or a bottle of vegetable oil and a deep pan (please be careful)
If you don’t like chicken the batter would work great on some vegetables and you could always use the sauce as dipping sauce.
Serves 2
- 2oog self raising flour
- 1 tsp baking powder
- really cold fizzy water
- 2 chicken breasts, thinly sliced.
- plain flour for dusting.
- salt
- pepper
- 1/2 sweet red pepper, sliced
- 4 small bis of broccoli
- 5 chestnut mushrooms, sliced
- 1/2 courgette cut into batons
- 1 carrot cut into batons
- small handful of mangetout
- 4 baby sweetcorn, chopped
- pinch of chilli plan.
- rice or noodles to serve with.
- olive oil or sesame oil
For the sauce
- 3 tbsp soy sauce
- 1 orange, juice only
- 1 tbsp sesame seeds
- handful fresh coriander
- 1 lime, juice only
- 1 tbsp honey
- 1 tsp chilli flakes
Method
- Heat your fryer or oil up to 180 degees.
- Put the flour and baking powder into large bowl and gradually add the sparkling water mixing well until you get the consistency of double cream, add a pinch of salt, a little bit of pepper and a pinch of chilli powder. Set aside.
- Add some plain flour to a bowl, season with salt and pepper then coat the chicken slices in it.
- Heat a splash of or sesame oil in a wok or frying pan, and stir fry the vegetables for a minute, add the sauce ingredients and stir well.
- Dip the chicken into the fryer and fry for 3-4 minutes until golden brown.
- Remove the chicken and drain on some kitchen paper.
- Remove the vegetables from the wok
- Serve with rice and the stir fried veg.
Hairy Bikers Chilli Beef Pies Recipe
I got the Hairy Bikers Perfect Pie Book way back when it came out and I’ve cooked a fair bit out of it so far and even combined a couple of the recipes to make a different version but one of the ones I’d really been looking forward to trying was the Chilli Beef Pies, mainly because the crust was a mix of Parmesan and Polenta and i’ve never cooked with Polenta before. I was also looking forward to seeing how the filling tasted as at first the ingredients looked a little on the boring side.
They turned out really well and the Polenta gave a nice crunch to the pastry and in all honesty the filling was pretty delicious although I’d have possibly liked a bit more depth and maybe some Kidney Beans, which weren’t in the recipe but seemed to be in the picture in the book. The only issue I had was preventing the pastry from breaking up when trying to form the pies so go carefully when trying to wrap the pastry round the filling.
The recipe makes 8 pies, I cooked 4 and froze 4, I’ve not cooked the frozen ones yet but the cooked ones did taste great the next day too. Having said that I’d quite like to try them with a modified version of my chilli con carne recipe and see which came out on top
Ingredients
- 500g Lean minced beef
- 1 medium onion, finely chopped
- 2 cloves of garlic, crushed
- 2 tbsp sunflower oil
- 1 heaped tsp smoked paprika
- 400g tin chopped tomatoes
- 100ml red wine
- 300ml of beef stock
- 40g pickled green Jalapeños, sliced
- 2 tbsp quick cook polenta
- 3 tbsp roughly chopped fresh coriander
- salt
- pepper
- 100g plain flour
- 200g quick cook polenta
- 150g cold butter, cut into cubes
- 75ml just boiled water
- 50g Parmesan cheese, finely grated
- 1 egg beaten.
Method
- Heat the sunflower oil in a large pan and fry the onion for 5 minutes, adding the garlic for the final minute. add the mince to the pan, breaking up any big chunks with a wooden spoon. Fry over a medium heat for 5 mins stirring regularly.
- Sprinkle with Paprika and cook for a further minute.
-
Tip the tomatoes, red wine, sock and Jalapeños to the pan, stir well, season with salt and pepper, bring to the boil and simmer for 25minutes, add 2 tablespoons of polenta and stir until the mix thickens. Remove from the heat and add the chopped coriander. Leave to cool
- To make the pastry, put the flour and polenta in a large bowl, rub in the butter until the mix resembles breadcrumbs
- Add the just boiled water and mix with a wooden spoon until the mix comes together, leave to cool for a few minutes then wrap the mix in cling film and place in the fridge for an hour.
- Remove from the fridge and knead in the Parmesan
- Pre heat your oven to 200 degrees c.
- Divide the dough into 8 balls, then on a well floured worktop roll each ball out into a 16cm round.
- Divide the filling between the 8 discs, leaving a 2cm gap around the edge of each disc.
- Now brush the lip of the discs with the beaten egg and carefully bring the edges up to cover the filling, pinch together to make a small parcel.
- Brush the completed parcels with beaten egg.
- Place the pies on some baking paper and cook in the oven for 25 minutes until golden brown.
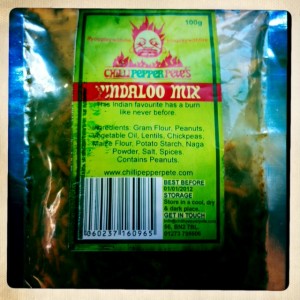
Chilli Pepper Pete’s Vindaloo Mix
Back in August while at the pub after the Great British Beer Festival Matt from the Evening Star pub in Brighton very kindly brought me a present from his local purveyor of crazy chilli products, Chilli Pepper Pete. I’ve had a few of Pete’s sauces before and was pretty impressed so I had to give the vindaloo mix a go there and then.
So we ripped open the silver foil bag and tucked in, there was a nice crunch from the mix, plenty of spices and a nice sweetness from the nuts, but then the heat from the Naga powder really kicks in and you start to wish you’d not eaten a small handful. The burn is pretty intense, it made a stifling hot day in London even hotter and more unbearable. It took a long while for the burn to die down but once it did there was part of me that just wanted some more, It’s stupidly addictive and tasty despite the pain.
It wasn’t long before the packet was being passed around the pub, as word spread more and more people wanted to test their metal against the Vindaloo Mix, needless to say soon after people were in tears, sweating and swearing profusely and running to the shop across the street for a pint of milk. Generally despite the pain I think it was a big hit, with some pub goers handling it considerably better than others.
In hindsight this probably wasn’t a wise thing, at the time I was drinking Magic Rock Human Cannonball, for those of you not familiar with it its a big hoppy brute of a beer, and hops really do intensify chilli when mixed together.
One tip is to remember not to rub your eye after picking up the mix, that really doesn’t help either….I swear I couldn’t see straight for a couple of hours but that could have been the beer.
If you want to give it a go then you can buy some from Chilli Pepper Pete’s website here. It’s £2 for 100g
Chilli Pork Scratchings
Firstly sorry that it’s been so long since I posted on here, things have been very hectic of late so I’ve not had time to write as many blog posts as I’d have liked.
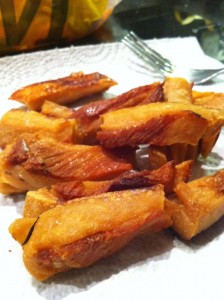
Anyway here’s a post that’s remained unfinished for far too long, It was the first time I’ve tried to make pork scratchings and I have to say I was quite impressed, I’ve seen lots of different methods for making them most of them involve frying, but for some reason I didn’t fancy dropping chunks of pig fat into my deep fryer so went for the oven baked method.
You can buy the rind in most supermarkets, if not just ask your butcher.
The longer your leave them in the fridge the better, I left mine in 24 hours but I’ve heard of people leaving them in there for up to 72 hours. You can also soak your rind if you want to but I didn’t bother this time.
Ingredients
- Big chunk of pig rind
- Salt
- Chilli flakes
- Pinch of paprika.
Method
- Cut the rind into nice big chunks and spread out on a baking tray.
- Sprinkle with a good amount of salt over the rind and place in the fridge and leave for a minimum of 24 hours
- Heat your oven to 200 degrees C
- Sprinkle the rind with some chilli flakes and paprika
- Place the rind in the oven and bake for 15 mins.
- After 15 mins turn down the oven to 140 degrees C.
- Now the trick is to bake them until they are nice and golden and crisp, I turned mine every 15 minutes and drained off the fat each time too. I think they took just under 2 hours in total but a lot will depend on the size of your scratchings.
- Once golden and crisp, remove from the oven and place on some kitchen roll to drain and cool.
- Enjoy with a beer and some chilli sauce to dip them in.
2012 Chilli Grow List
Here’s my 2012 chilli grow list, I’ve just planted them in the heated propagators and will wait and see what happens, I’ll post some progress on here and twitter as and when it happens, I’ll also posts my vegetable grow list as and when I plant them.
The chillis are a mix of some I grow every year and some new ones, I’ve also got some chillis over wintered in the greenhouse. The tomatoes are my favourite varieties as I’ve just decided to grow the ones I like this year to save on space.
2012 Chillis (sown 22/01/12)
- Mixed Caribbean – A mixture of 5 very hot chilli peppers from the Caribbean, includes Habanero and Scotch Bonnet chilli peppers in different colours and shapes.
- Naga Morich – is a small-medium shurub with large leaves, small, five-petalled flowers, and blisteringly hot fruit. It differs to the Bhut Jolokia and Bih Jolokia in that it is slightly smaller with a pimply ribbed texture as opposed to the smoother flesh of the other two varieties.
- Sweet Pepper – Traditional sweet peppers, I use loads of them so like to grow them.
- Guajillo chilli – The guajillo chilli’s thin, deep-red flesh has a green tea flavor with berry overtones. Its fruits are large and mild in flavor, with only a small amount of heat (rating 2,500 to 5,000 on the Scoville scale).
- Hot Portugal – one of my favourites and a type of Anaheim, great flavour and not too hot.
- Gold cone chilli – Capsicum annum that has small white/yellow pods that look great on a window sill or patio, brilliant for in salads or stuffed with cheese.
- Aji Pinguita De Mono – The name Aji Pinguita De Mono translates to ‘ little monkey dick’ a reference to the pods shape. The pods are small measuring only 0.5 to 1in long, are slightly curved and taper to a point. They mature from green to a bright scarlet. This variety is among the hottest of the little Aji’s known in Peru measuring 70,000 – 80,000 Scoville units. The Aji Pinguita de Mono is found in all regions of the Peruvian jungle, mainly in the central valley of Chanchamayo.
- Aji Limon – Another Peruvian jungle chilli, bright yellow pods with a distinctive citrus flavour, great in salads.
- Violet Cayenne – Brilliant purple and white flowers, 3″ long thin purple pods, a real stunner.
- Numex Big Jim – The largest of all the chillis, mild heat, perfect for stuffing, frying, battering etc etc.
- Dedo De Moca – Small Brazilian variety, often dried and ground also known as pimenta-calabresa.
2012 Tomatoes (sown 22/01/12)
- Beams Yellow Pear – Sweet, yellow pear shaped tomato.
- Hawaiian Currant – Tiny, pea sized tomato, perfect for salads and garnish. Great as a snack too.
- Red Cherry Tomato – Generic red cherry tomato, always a favourite.
- San Marzano Tomato – widely considered as one of the best tasting tomatoes in the world and a firm favourite of mine.
2011 Chillis (over wintered)
- Sweet Bell Pepper – Small, sweet, no heat but great for stuffing
- Hot Portugal – one of my favourites and a type of Anaheim, great flavour and not too hot.
- Naga Morich – is a small-medium shurub with large leaves, small, five-petalled flowers, and blisteringly hot fruit. It differs to the Bhut Jolokia and Bih Jolokia in that it is slightly smaller with a pimply ribbed texture as opposed to the smoother flesh of the other two varieties.
- Yellow Scotch Bonnet – hot and fruity, great chilli
- Orange Habenero – like the yellow scotch bonnet but orange.
- Explosive ember – Purple leaves, purple chillis that grow upward.
- African sun – I don’t know much about this one, hoping it’s second year will prove more fruitful
Picante Paella Recipe
Paella is one of those things that seems to differ depending on who you talk to and where you go, I’ve never been a fan of the ones crammed full of fish and tomatoes, I tend to prefer the meaty ones, especially the one I once had with rabbit in.
This is a super simple, serves 2 greedy people and takes about 20 minutes to cook and if you don’t like prawns you can always leave them out. It also works really well with good chicken stock but when I made this last night I didn’t have any stock so used the oxo cube and water.
If you really want to stir the rice you can, although a Spanish friend once told me never to stir it so for once I’ve done as I’m told.
- 1 Chicken breast, cut into chunks
- 1 small packet of smokey bacon lardons
- 4 mini cooking chorizo (picante ones if possible), skin removed and then sliced
- 10 (ish) large raw king prawns
- 1/2 green pepper, thinly sliced
- 1/2 red pepper, thinly sliced
- 1/2 yellow pepper, thinly sliced
- 5 large chestnut mushrooms, sliced
- 1 red onion, sliced
- 3 sprigs worth of thyme leaves
- 2 cloves of garlic
- 1 oxo chicken stock cube
- 350-40ml water
- 150g paella rice.
- pinch of saffron soaked in a tablespoon of water.
- Handful of chopped flat leaf parsley.
- 1/2 tsp dried chilli flakes
- 1 handful of frozen peas
- 1 medium tomato, chopped and seeds removed.
- 1 glass of white wine.
- salt
- pepper
- 1 1/2 tsp smoked paprika
- bay leaf
- olive oil
Method
- Heat a splash of olive oil in a large frying pan, add the bacon and cook until crispy, add the sliced chorizo and cook for a minute or so before adding the chicken.
- Cook the chicken for a few minutes until its nice and golden then add the mushrooms, peppers and onion along with the garlic, bay leaf, chilli flakes and paprika. Stir well.
- Cook until the onions are soft, add the wine, give it a really good stir then add the rice , once the rice has soaked up the wine add the water and crumble in the stock cube (unless your using stock then just add the stock), give it a quick stir.
- Now turn the heat down so the pan is simmering and just a say bubbling. The trick here is not to stir anything and leave it for 10-15 minutes, checking it every now and then to make sure it’s not drying out too much, the rice will soak up all the juices and puff up nicely, the bits that catch on the pan add a little more texture and taste fab too.
- The rice will start to soften so after 15 minutes try a few grains, if they are about cooked add the prawns and peas, pushing them into the rice but not stirring too much as you don’t want to disturb the pan too much.
- Cook until the prawns are pink and cooked through.
- Sprinkle with chopped parsley and season with salt and pepper.
- Remove from the heat and give it all a good mix before you plate it up.
Enjoy!
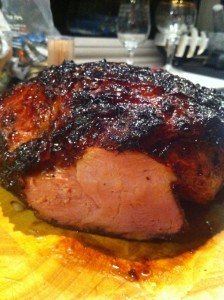
Chilli and Cherry Glazed Ham
I know you are all probably sick of Ham and Gammon after the festive period but now is a great time to buy a nice big ham as they are on offer just about everywhere.
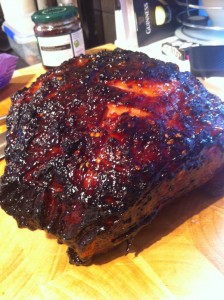 This is pretty much a Jamie Oliver recipe out of a little booklet that my future mother in law gave me a few weeks ago, I changed it slightly as I could’t get any plum jam so ended up buying some cherry jam instead.
How long you cook the meat for will depend on the size of your joint and how well done you like it.
As well as the chilli flakes you could also add some sliced fresh chillis or sliced pickled Jalepeno towards the end of glazing.
The broth from the initial cooking can be used for soup or stock if it’s not too salty and the juices from roasting make wicked gravy.
The meat is delicious hot or cold and will last a while in an air tight container in the fridge.
Ingredients
- 3Kg Gammon joint (smoked or unsmoked it’s up to you)
- 1/2 tbsp whole black peppercorns
- 1/2 tbsp whole white peppercorns (or you can just use a whole tbsp of black ones)
- 1 onion, peeled and cut into wedges
- 1 carrot, cut into chunks
- A few sprigs of fresh Thyme
- 1 Piece of celery, cut into chunts
- Water.
- 1/2 jar of cherry jam
- 1 tsp chilli flakes.
- 1 fresh chilli, halved (optional)
- 6 cloves (optional)
- Pre heat your ove to 160 degrees.
- Place the meat in a roasting tray or a large pan that you can fit in your oven.
- Fill with water so it comes about half way up meat.
- Place the onion, celery, carrot, thyme, peppercorns, cloves and fresh chilli around the meat.
- Cover the pan with a lid or foil and bake for 90 mins and cooked through (use a meat thermometer to check if you have one)
- Remove from the oven, keep it covered and leave to cool for at least 30mins.
- Once the meat is cool enough to handle, remove most of the skin, leaving a thin layer of fat on the top.
- Carefully use a sharp knife to score the fat in a diamond pattern.
- Turn the oven up to 200 degrees
- Put the meat back into the oven and put the meat back in for 30-40 mins until the fat starts to crisp up.
- Carefully spread some cherry jam over the meat, sprinkle with chilli flakes and then place back in the oven.
- Now this bit is where you need to use your judgement, keep roasting the meat for 30-60 mins, basting and adding more jam if necessary, until the jam is crisp and sticky and the meat is cooked how you like it.
- Remove from the oven, leave to cool lightly and then slice and serve.
Just In: Nagi Nagi Hot Chilli Sauce
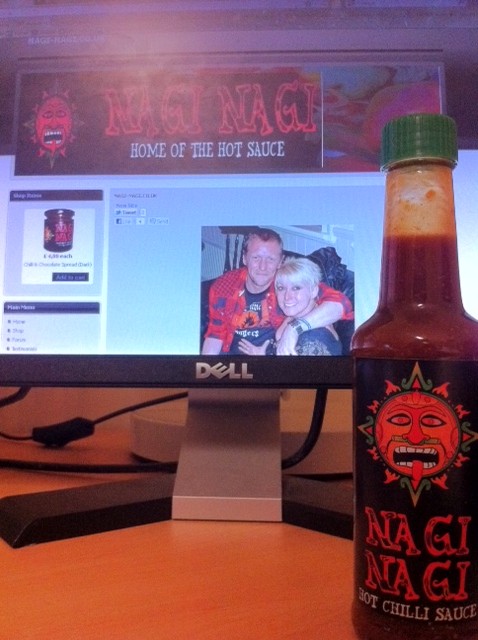
A few days ago Lance over at Eezee web put me in touch with one of his mates, Paul who makes chilli sauces and jams. After a quick email conversation with Paul I could tell he was passionate about creating great tasting sauces with natural ingredients.
The company name Nagi Nagi comes from one of Paul’s colleagues who used to call the Naga chilli, Nagi Nagi instead of Naga, after the name stuck they found out that Nagi in Polish means naked…which I think is quite appropriate as their products contain no additives
A bottle of Nagi Nagi Hot Chilli Sauce has just landed on my desk so I will give it a try over the next couple of days, I’m pretty sure it will be great on boxing day turkey sandwiches.
It retails at £3.50 per bottle and the bumf says
“Our HOT sauce is lovingly crafted from the very finest sourced ingredients. We hand pick every ingredient in this sauce and guarantee it will tantalize and tease your taste buds to the EXTREMES.We have achieved a very fine balance of heat with taste. This very versatile sauce will compliment and spice up even the most ordinary dish.”
I really love the sound of that and the branding and the description on the bottle are great, although it could do with the website on but that’s just me being picky!!
You can follow Paul on twitter here, check out his facebook page here or buy stuff from his site here.
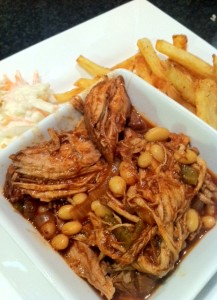
Slow cooked BBQ pulled pork recipe
Pork shoulder has to be one of the best cuts of meat available, It’s cheap, packed full of flavour and can be cooked is lots of different ways, as a result I’m a huge fan, whether it’s hog roast, BBQ pulled pork (like in Hickorys) or Slow roast spicy pork for Sunday roast it’s always a winner.
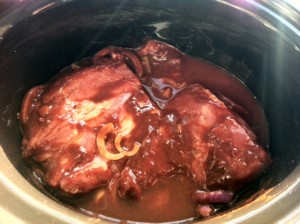
I’ve never actaully tried putting pork shoulder in the slow cooker or making a BBQ sauce so this was a bit of an experiment, It was also a bit of a spur of the moment decision to make so I didn’t marinate the meat before hand.
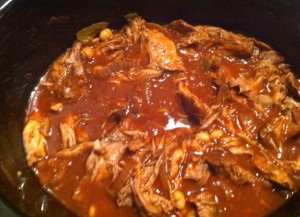
Cooking time will depend on the size of pork and whether you choose to use a slow cooker or an oven, but I’d say the minimum cooking time is about 6 hours, I left mine in my slow cooker for just over 8, the first hour it was set on high, after that on medium.
To be honest it was a great success, I’d have maybe added an extra chilli and a splash of balsamic and possibly a bay leaf to add a bit of extra depth but for a first attempt I was over the moon.
Try to get hold of either some Chipotle sauce (like Mr Vikkis Ranch Sauce or one Stop Hoy Shops old smokey) or some Chipotle paste, if you can’t then try using BBQ sauce from the supermarket.
I served mine with a good dollop of coleslaw, home made skinny fries, with nandos piri piri salt and a soft white bread bun.
It wen’t something like this.
Ingredients
- 1.5 kg pork shoulder
- 4 garlic cloves, crushed
- 1 green chilli, sliced
- 1 tsp mustard powder
- 1/2 tsp all spice
- 1 bayleaf
- 1/2 tsp cumin powder
- 1 red onion, thinly sliced
- 3 tsp paprika
- 1/2 tsp cinnamon
- 2 tbsp tomato puree
-
3 tbsp Henderson’s Relish (or Worcestershire sauce if you are from down south)
- 4 tbsp soft brown sugar
- 4 tbsp cider vinegar
- 2 tsp corn flour
- 60ml chipotle sauce (you can add a bit more if you like)
- 1 tin of haricot beans, drained and rinsed.
- Salt
- Pepper
- Water
Method
- Trim the fat off the pork shoulder, either discard or use for crackling.
- Depending on the size of your pork shoulder, chop into fist size chunks.
- Mix all of the ingredients, apart from the pork, beans and water , in a large bowl, taste then season, add a little more spice if you like.
- Add the pork into the bowl and mix well.
- Tip the contents of the bowl into your slow cooker
- Add some water to the bowl and swirl around to get the rest of the sauce out.
- Tip the water into your slow cooker, so it just about covers the pork, if not add a little more.
-
Turn the slow cooker on high and cook for an hour.
- After an hour turn down to medium and leave for 5-7 hours.
- An hour before you want to serve the meal, tip the drained beans into the slow cooker and mix well.
- Just before you are going server the meal, remove the pork, pull apart with a couple of forks and then tip it back into the slow cooker, mix well.
- Serve with your chosen accompaniment’s.
Just in: Ching’s Fast Food: 110 Quick and Healthy Chinese Favourites
I’ve just been sent a copy of Ching’s Fast Food for review, after the success of her TV series, Ching-He Huang has decided to pay homage to the Chinese Takeaway with this new cookbook.
I had a quick flick through last night and it looks fantastic there’s plenty of recipes to keep just about every Chinese and Cantonese food fan happy, there’s plenty of meat, fish and vegetable recipes some with a good helping of chilli too. The recipes are split up into handy sections and with the exception of delicious looking deep fried dishes the recipes seem reasonably healthy and should give the takeaway a run for it’s money.
The recipes seem simple and straightforward and the ingredients should be easy to get hold of so I will write more once I’ve cooked a couple of recipes which will be in the very near future as my mouth was watering just flicking through the book.
In amongst the recipes there’s some great photography and what look like interesting anecdotes so I will certainly be having a read of those.
If you’d like to get your self a copy or even better get a copy for someone else for Christmas then you can currently get it for £6 on the WHsmith website here. You can also visit Ching’s websit here
Archives
- July 2015
- June 2015
- April 2015
- February 2015
- January 2015
- August 2014
- June 2014
- May 2014
- March 2014
- February 2014
- January 2014
- December 2013
- November 2013
- October 2013
- August 2013
- July 2013
- June 2013
- May 2013
- April 2013
- March 2013
- February 2013
- January 2013
- December 2012
- November 2012
- October 2012
- September 2012
- August 2012
- July 2012
- June 2012
- May 2012
- April 2012
- March 2012
- February 2012
- January 2012
- December 2011
- November 2011
- October 2011
- September 2011
- August 2011
- July 2011
- June 2011
- May 2011
- April 2011
- March 2011
- February 2011
- December 2010
- November 2010
- October 2010
- September 2010
- August 2010
- July 2010
- June 2010
- May 2010
- April 2010
- March 2010
- February 2010
- January 2010
- December 2009
- November 2009
- October 2009
- September 2009
- August 2009
- July 2009
- June 2009
- May 2009
- April 2009
- March 2009
- February 2009
- January 2009
Calendar
| M | T | W | T | F | S | S |
|---|---|---|---|---|---|---|
| 1 | 2 | 3 | 4 | 5 | 6 | |
| 7 | 8 | 9 | 10 | 11 | 12 | 13 |
| 14 | 15 | 16 | 17 | 18 | 19 | 20 |
| 21 | 22 | 23 | 24 | 25 | 26 | 27 |
| 28 | 29 | 30 | 31 | |||
Categories
- Bottom of the garden
- Chilli Announcements
- Chilli competition
- Chilli diary
- Chilli Drinks
- Chilli Gallery
- Chilli Growing
- Chilli Growing Equipment and Supplies
- Chilli Jams, Sauces and chutneys
- Chilli Main Courses
- Chilli News
- Chilli Products
- Chilli Puddings
- Chilli Recipes
- Chilli Snacks & Bites
- Chilli Starters
- Non Chilli Stuff
- Other Vegetables
- Using Chillis


